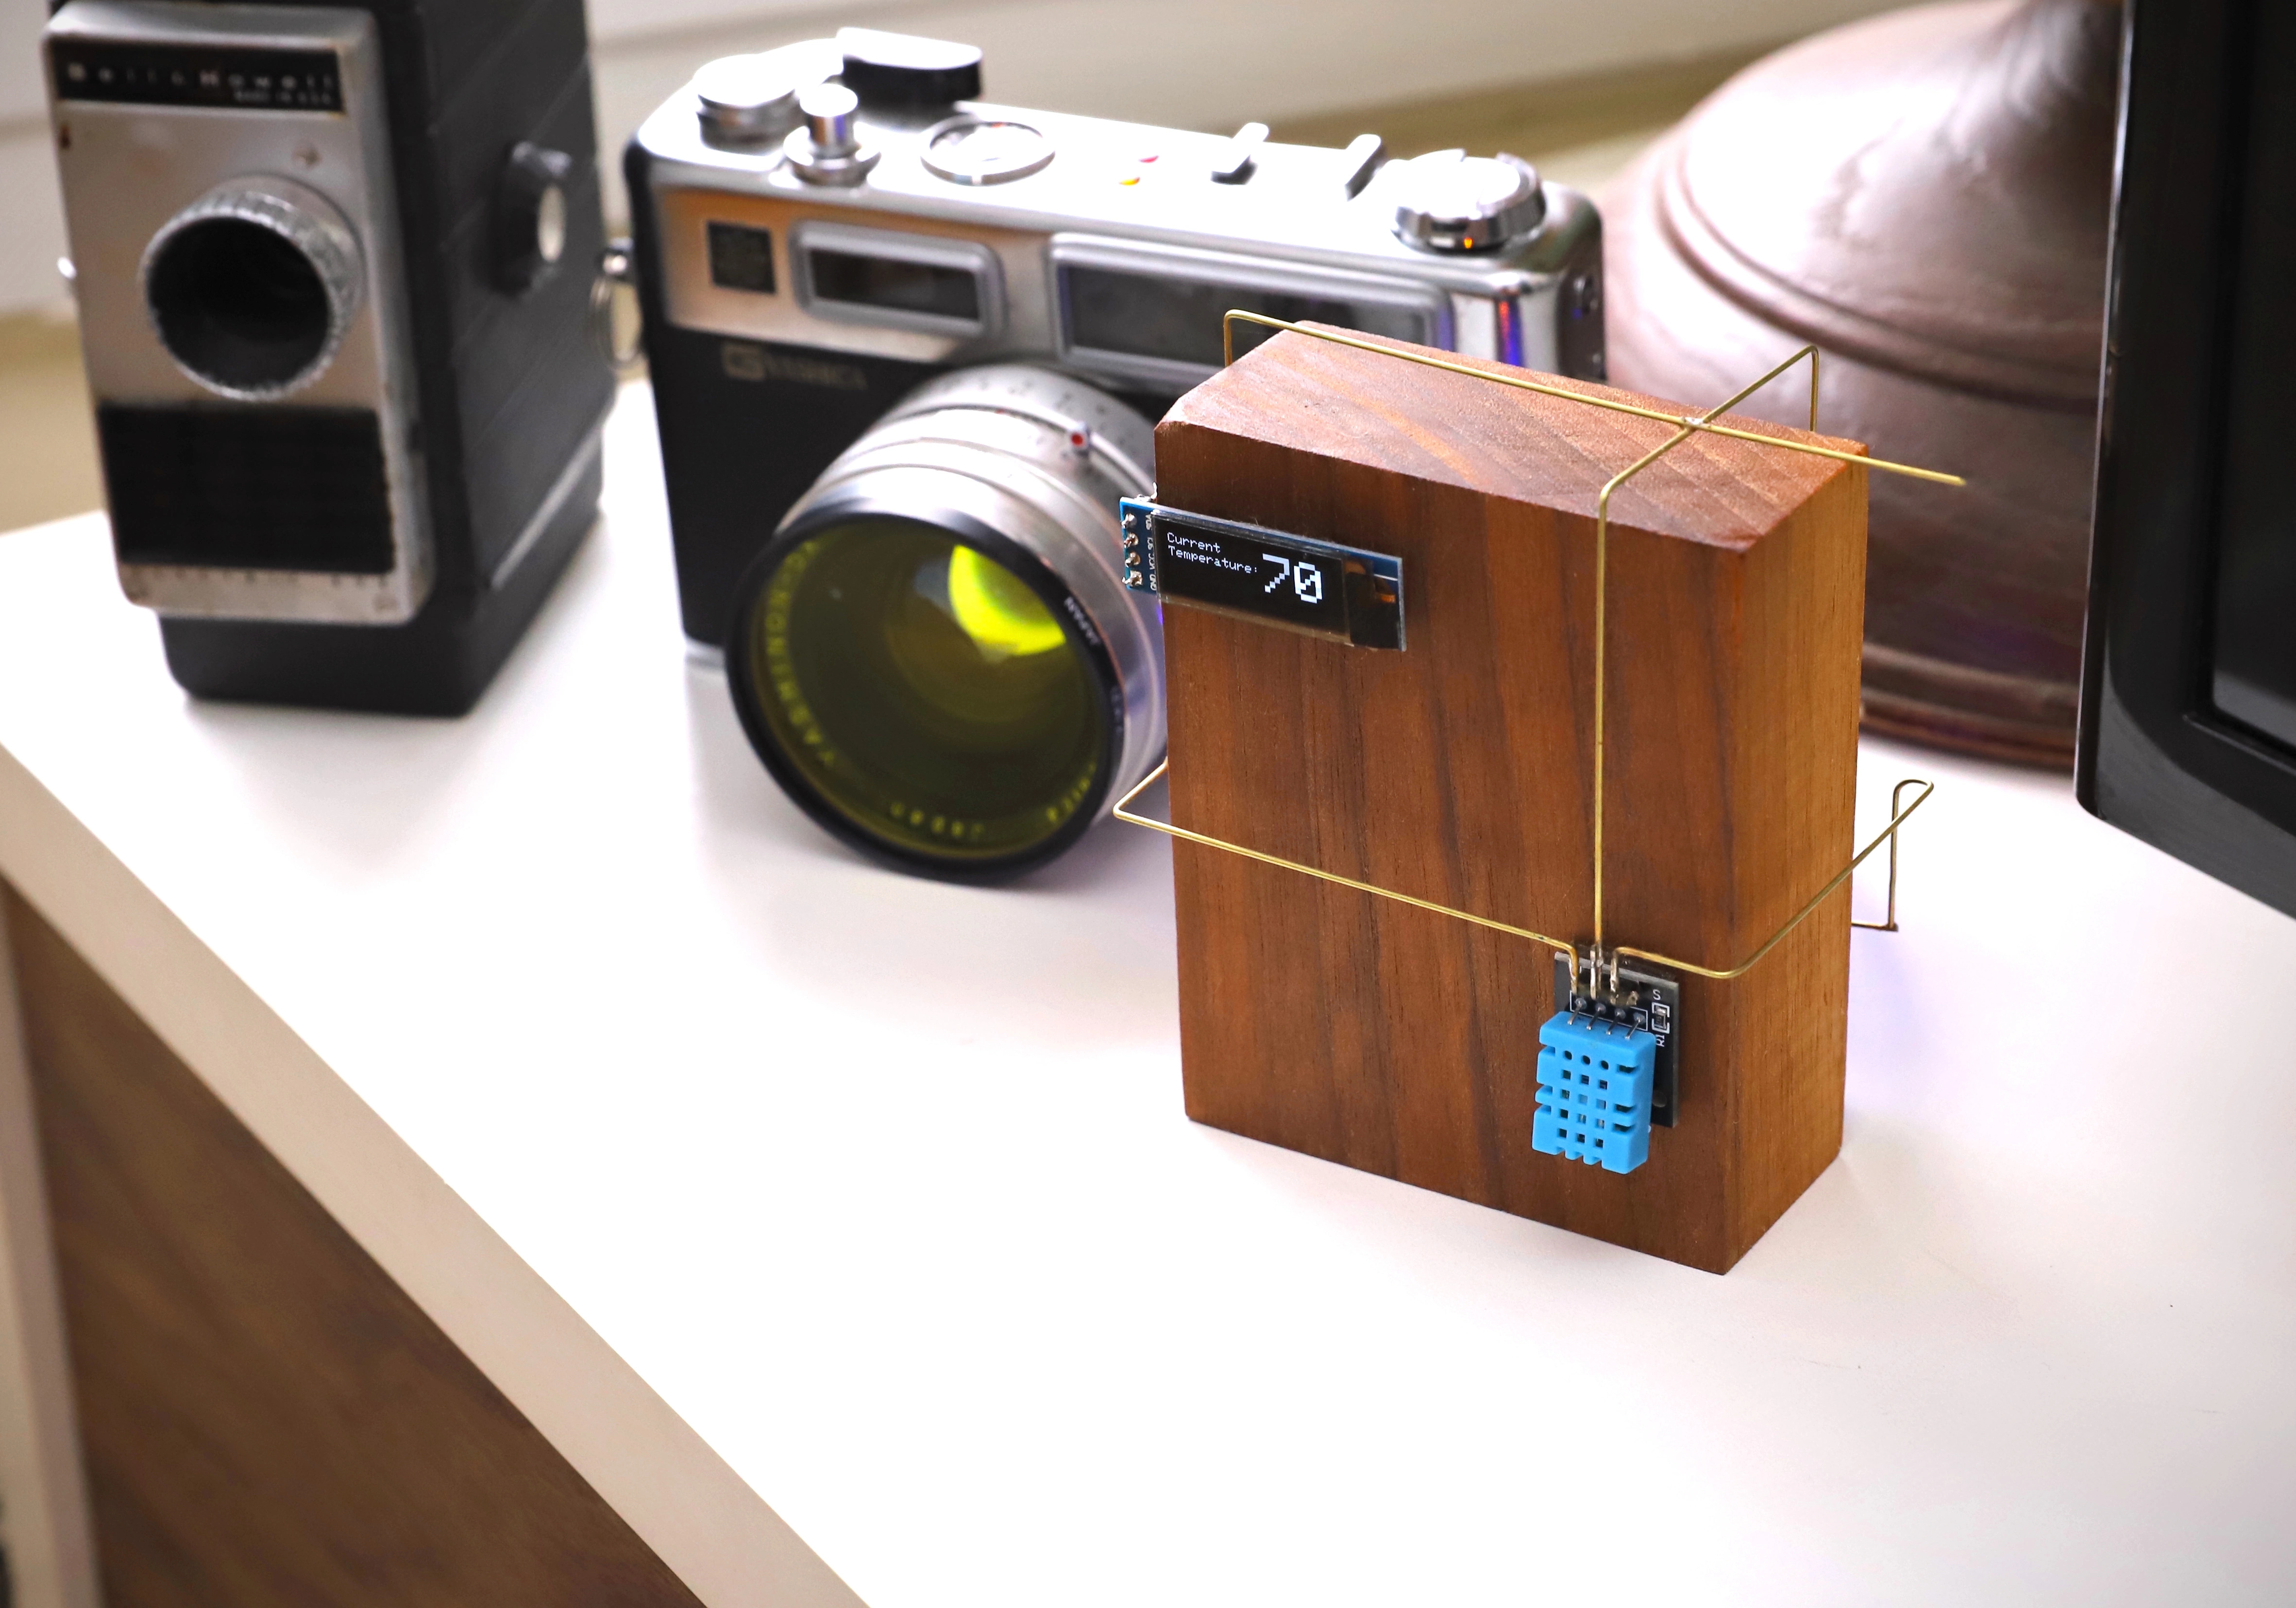
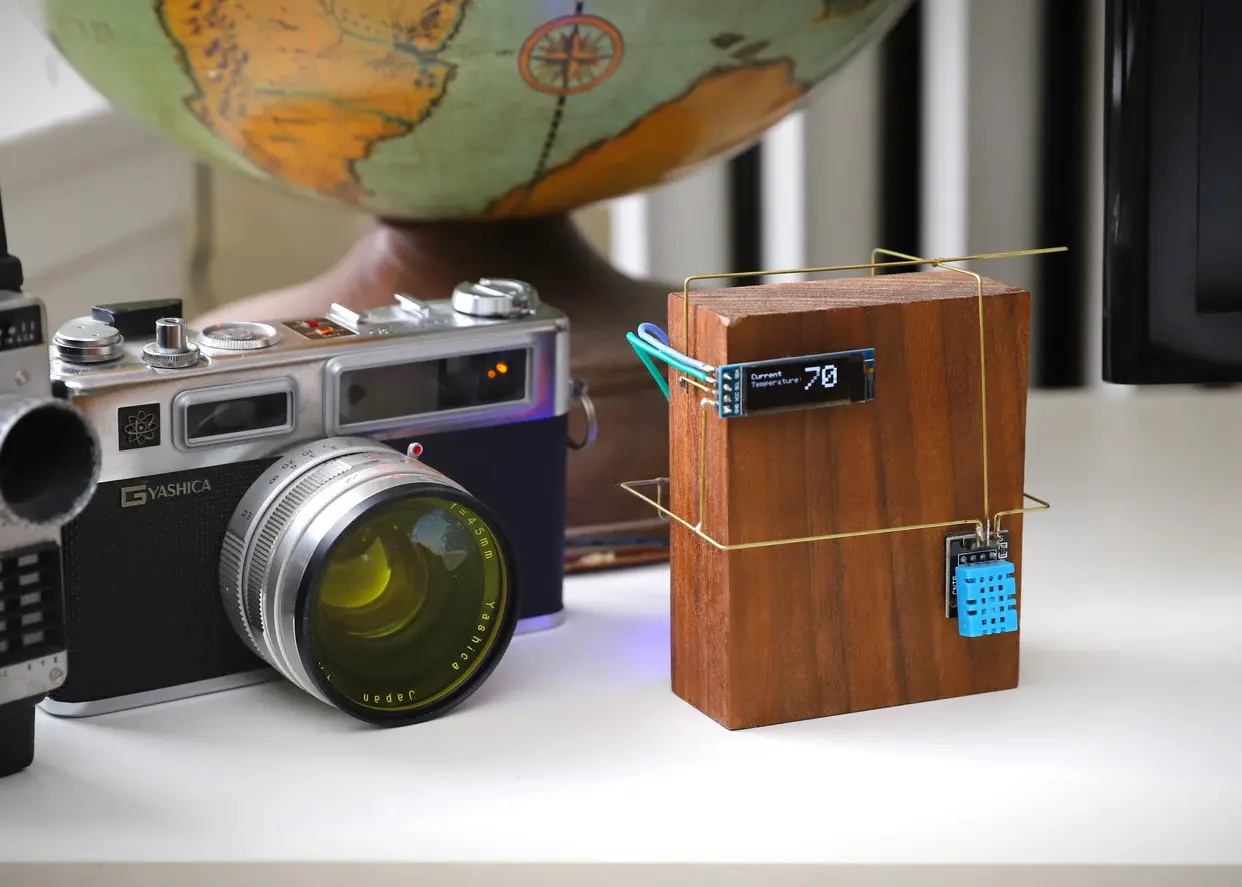
This is a circuit sculpture that is meant to blend form and function. It gives you constant visual feedback of the temperature of the room, while also looking nice enough to be able to be placed prominently the room - somewhere it can be seen easily.
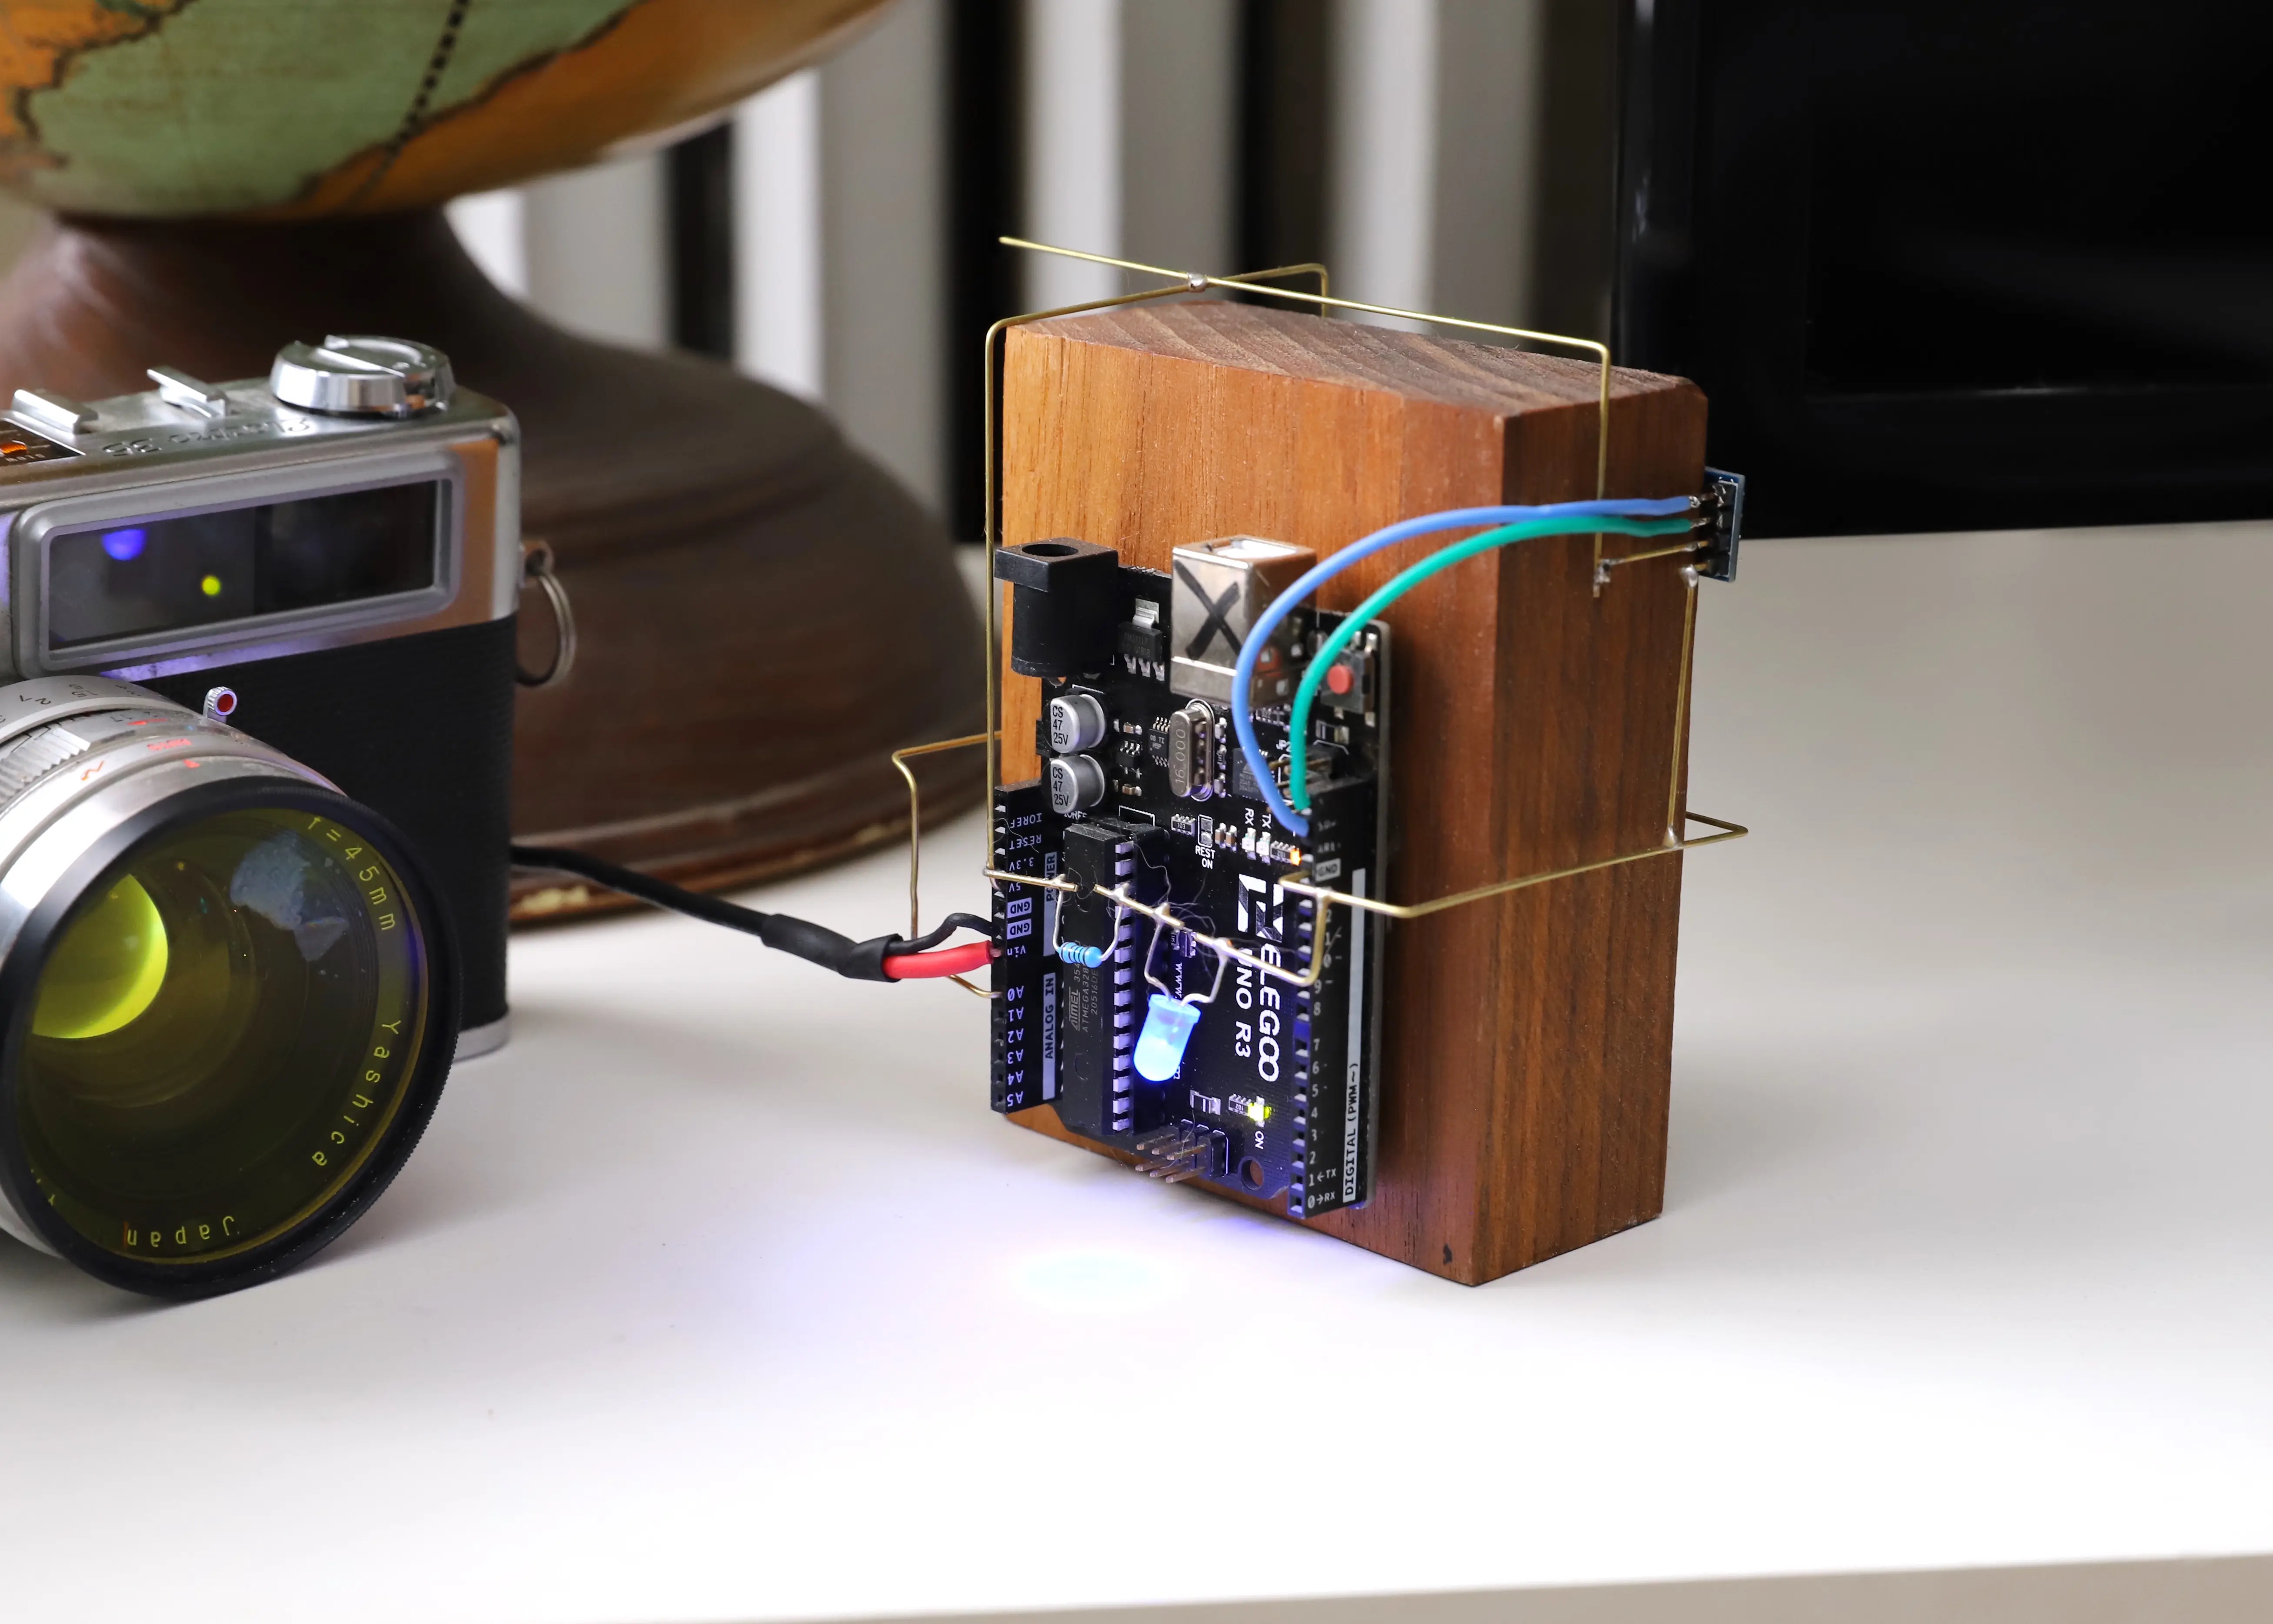
It is built mostly from an Arduino, brass rods, and a block of walnut.
Materials
Specific components and materials can be found in the BOM table below. Most are cheap or can be found in your parts bin or leftover from another project. The only thing that might be hard to find is the brass rod. I got mine from K&S Precision Metals, which you can find it on Amazon. I used 1mm brass rod, but you can use any size you want. Just make sure it fits into the GPIO pins of the Arduino board you're using.BOM
| Part | Quantity | Notes |
|---|---|---|
| Arduino Uno | 1 | You can use any arduino you want but for the size of this build, an Uno works well visually |
| 1mm brass rod | ~3 ft | K&S Precision Metals |
| silicone wire | - | Gives the sculpture a bit of variety, instead of being all brass rod |
| LED | 1 | In your preferred color, for ambient backlight |
| 220 ohm resistor | 1 | Higher resistance value if you want the light to be dimmer |
| DHT11 | 1 | Temperature sensor. Get the 3-pin version |
| SSD1306 OLED | 1 | 128x32 |
| Wall Adapter | 1 | Needs to be between 5-12V |
| Nano Tape | - | Any brand will do |
Code
The code for this sculpture is written in C++ and can be found on GitHub. It is provided in a .ino file, which can be opened in the arduino IDE. Just download the relevant libraries and it should work right out of the box.
If you are using a different IDE (like PlatformIO in VSCode for example) you will just need to add:
#include <Arduino.h>
to the top of the file and it should work smoothly.
Assembly
The build uses 1mm brass rod as most of its wiring. K&S Precision Metals is the best source for these. It's important to use 1mm exactly, because that is what fits into the GPIO pins of the Arduino boards.
I chose to use regular silicone-insulated wire for the two I2C wires on the OLED, while everything else is brass rods. This was purely for aesthetic reasons, to add some visual variety. Yuo cas do all the wiring with the brass rod if you prefer.
Brass rods have a few things going for them that make them good for this:
- Hold solder very well
- Pliable, while still being able to retain shape
- Look nice
Attaching the components to the wood is done with "Nano Tape". Nano tape is - from what I can tell - a real product that is somehow importantly different from regular tape. But if you search Amazon for nano tape, there are a million knock-offs that are basically just heavy-duty double-sided tape, and that's what we need here. I'm sure if you got real thing it would work as well. But I recmmend getting the random cheap knock-off for the purposes of this project.
You will want to first figure out the placement you want of the main components (the Arduino, temperature sensor, and OLED) and attach those using the tape. Once you do that. you can begin measuring out the brass rod and bending it to make the variuos connections. You will have to solder the brass to the components with the components already attached to the wood block, there is really no way around this.
Wiring Diagram
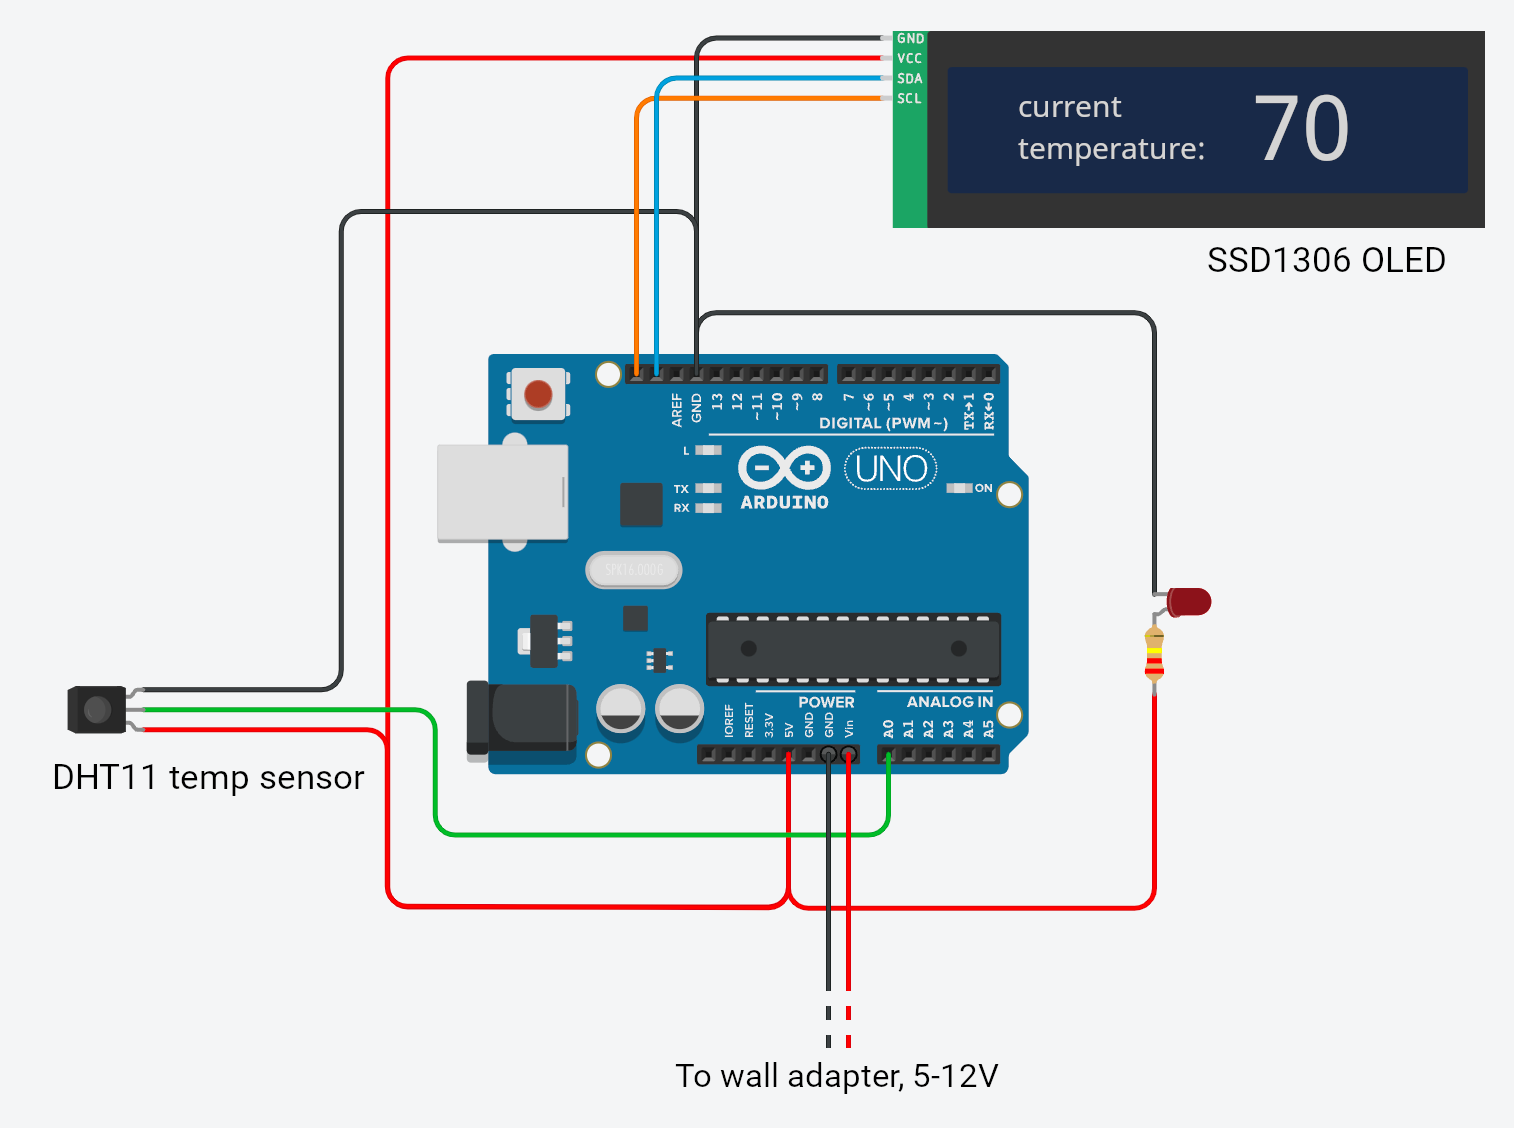
Since we are powering this device via the VIN pin, you need to provide a bit more than 5 volts. I used a 9V wall adapter, which works great. Just snip off whatever connector is on the end, and strip 4-5mm of insulation off the end of each wire. Tin it with a little bit of solder, and you should easily be able to insert them into the arduino pins. Just make sure you use a multimeter to verify which wire is Positive and which is Ground!
Wood Finishing
REMEMBER: You need to finish the wood BEFORE attaching the electronics!
Brass rod pairs nicely with walnut, and I had a bunch left over from a larger project. I used Rubio Monocoat ("pure" color) as a finish. I highly recommend it as a finish in general, but it's definitely overkill for this project if you don't already have it on hand.
If your looking for something else, I would recommend basically any kind of oil-based finish. This piece is really not going to get any kind of wear & tear, and oil finishes look better than finishes that are designed more for protection. Shellac would also work nicely.